Connect to wireless SSID CP@Staff using Windows 7 computer
|
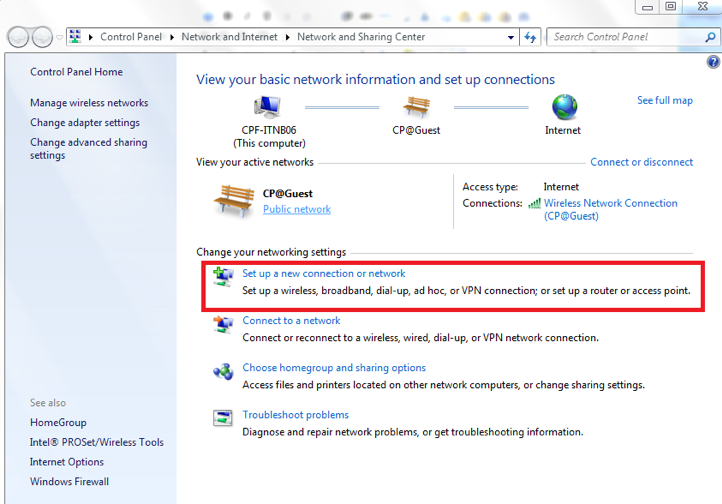
Step 1: Right click on the wireless icon, and click “Open Network and Sharing Center” |
|||
 |
|||
| Step 2: Click “Set up a new connection on network” | |||
 |
|||
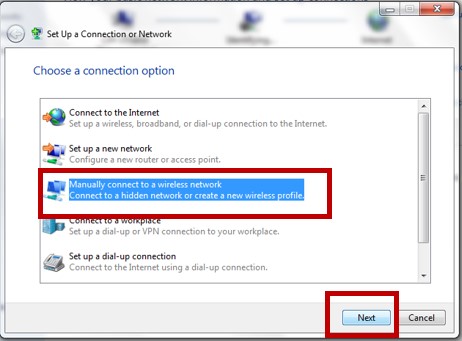
| Step 3: Click “Manually connect to a wireless network” and click Next button | |||
 |
|||
|
|||
 |
|||
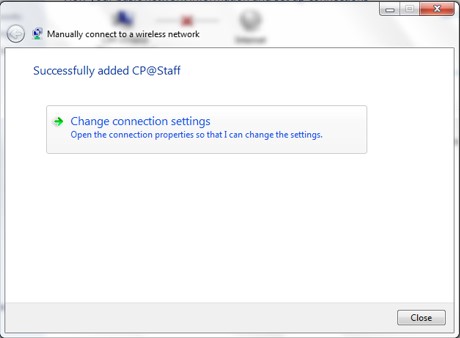
| Step 5: Click “Change connection setting” | |||
 |
|||
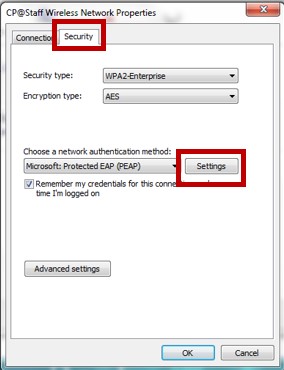
| Step 6: Click the security tab. Ensure setting match and then click “Setting” button | |||
 |
|||
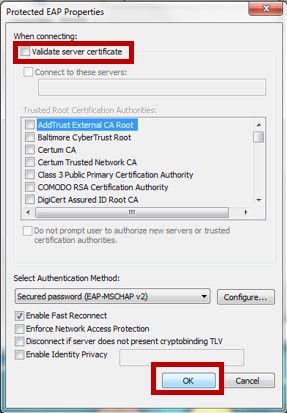
| Step 7: Uncheck “Validate server certificate” and click “OK” button. | |||
 |
|||
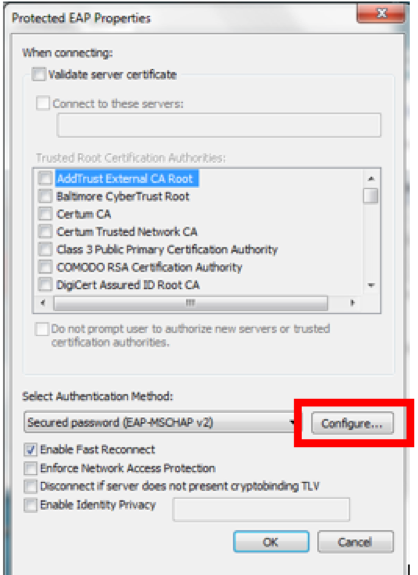
| Step 8: Click on “Configure” | |||
 |
|||
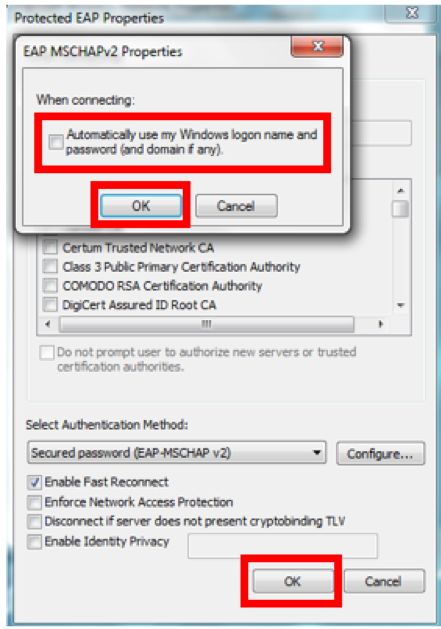
| Step 9: Unchecked “Automatically use my Windows logon name and password (and domain if any). Then, click "OK" for both. | |||
 |
|||
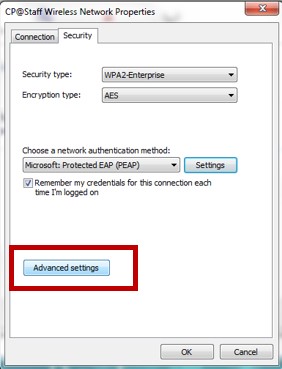
| Step 10: Click the “Advanced setting” | |||
 |
|||
| Step 11: Check “Specify authentication mode” and select "User authentication. Then, click "OK" | |||
 |
|||
| Step 12: Go to wireless icon at the taskbar and connect to “CP@Staff” | |||
 |
|||
Connect to wireless SSID CP@Staff using Windows 8 computer
|
Step 1: Right click on the wireless icon, and click “Open Network and Sharing Center” |
|||
|
|||
| Step 2: Click “Setup up new connection or network” on the left | |||
 |
|||
| Step 3: Click “Manually connect to a wireless network” and click Next button | |||
|
|||
|
|||
|
|||
| Step 5: Click “Change connection setting” | |||
|
|||
| Step 6: Click the security tab. Ensure setting match and then click “Setting” button | |||
|
|||
| Step 7: Uncheck “Validate server certificate” and click “OK” button. | |||
|
|||
| Step 8: Click the “Advanced setting” | |||
|
|||
| Step 9: Step 11: Check “Specify authentication mode” and select "User authentication. Then, click "OK" | |||
|
|||
| Step 10: Go to wireless icon at the taskbar and connect to “CP@Staff” | |||
|
|||
Connect to wireless SSID CP@Staff using Windows 10 computer
|
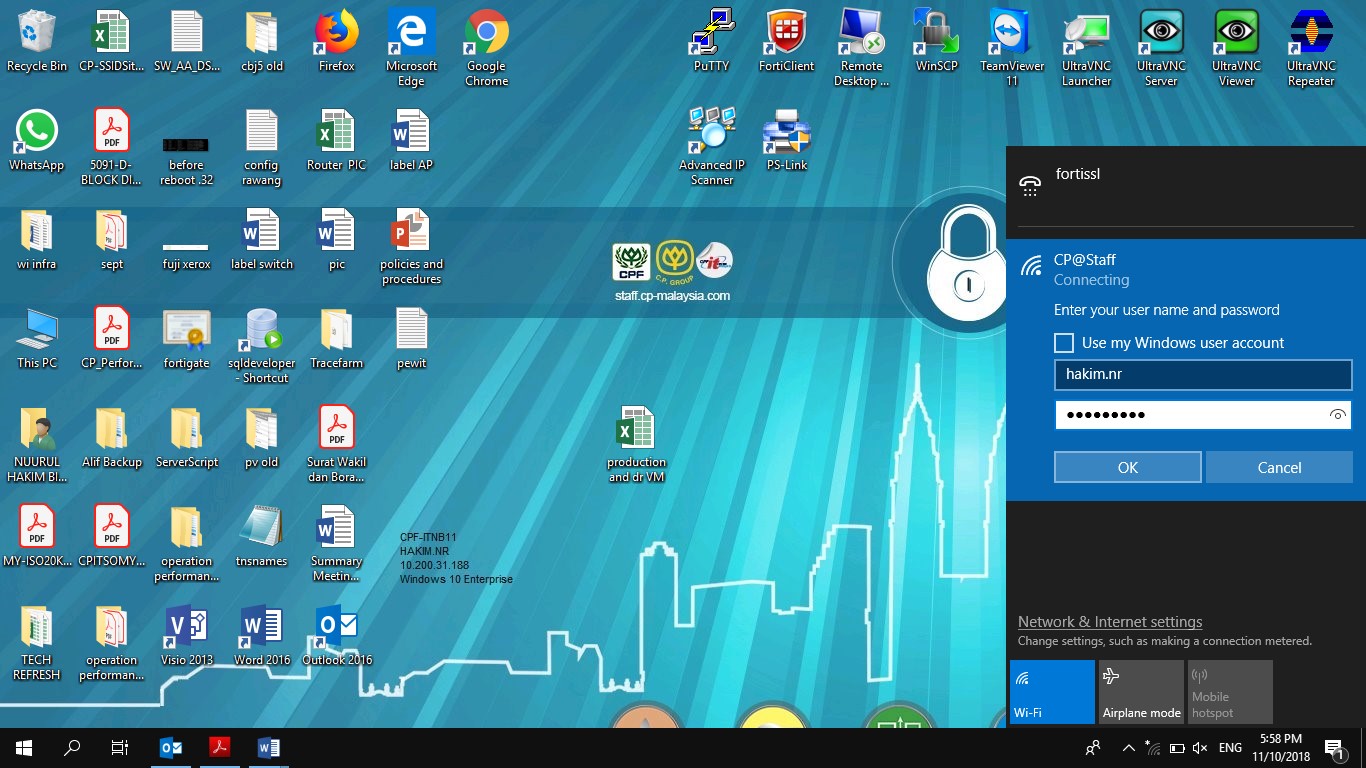
Step 1: Click on the wireless icon. After that click connect to SSID CP@Staff. |
|
 |
|
| Step 2: Enter your ID and password, after that click OK button | |
 |
|
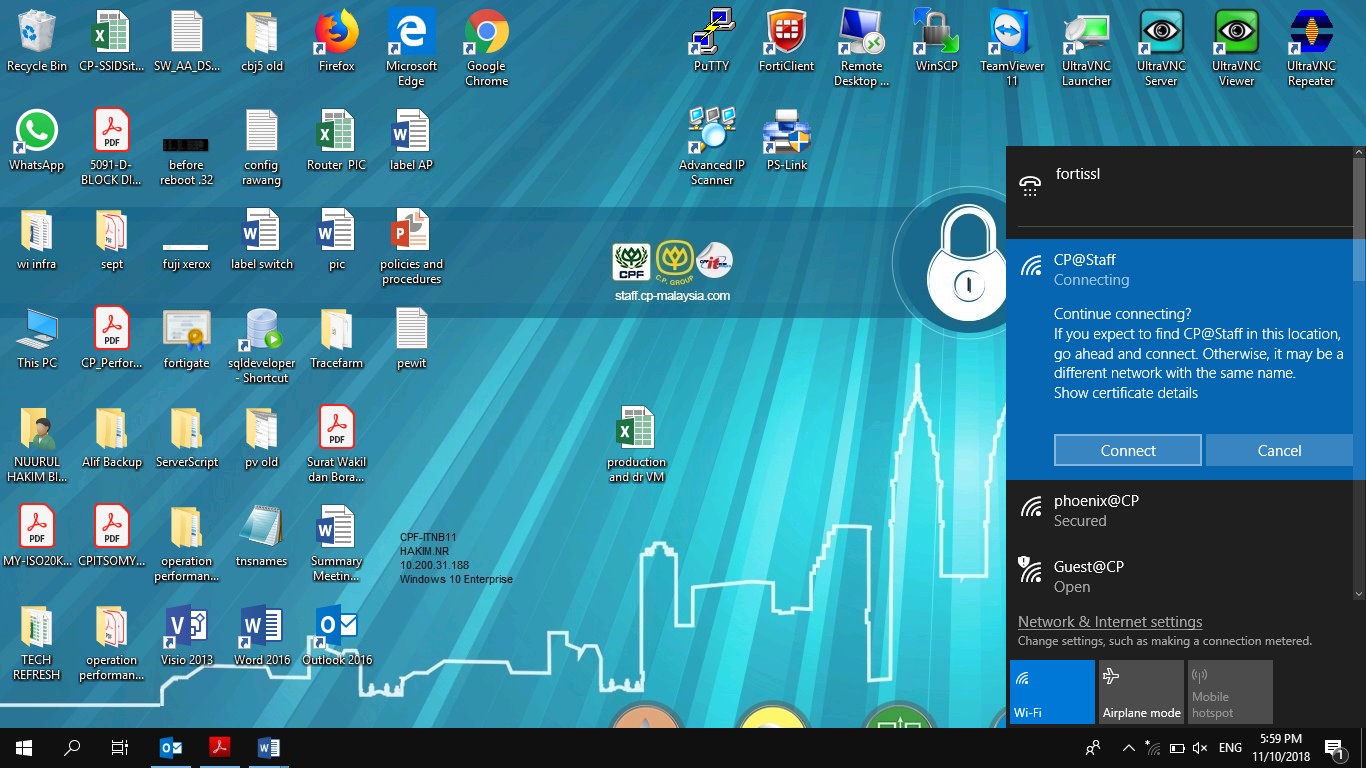
| Step 3: Click Connect button | |
 |